Glock connector ramp angles
The design of the Glock trigger is so simple and ingenious that it can be difficult to comprehend its operation. With the low parts count of the Glock, every part is important. The connector — which translates the rearward movement of the trigger (and thus, the trigger bar) to the striker assembly — is no exception.
Not only are there five Glock factory connectors for different applications, but there is a huge aftermarket in connectors as well. Some of the aftermarket connectors merely copy the corresponding Glock factory connect, while others have modifications (for better or worse) and others explore entirely new territories. Glock factory connectors are typically interchangeable among weapons (there are some exceptions), while the aftermarket offers both drop-in
connectors and those that must be custom-fitted to your weapon and preferences.
Although there are some wild connector designs out there, the main reason for changing connectors is to adopt a different angle for the ramp where the rounded nose of the trigger bar contacts the connector. Generally speaking, the steeper the ramp, the higher the effort required to pull the trigger fully to the rear, but the shorter the travel. Relaxing the ramp angle reduces the effort required to pull the trigger fully to the rear but at the expense of slightly longer travel.
Some aftermarket connectors allow the user to set trigger over-travel by means of additional material at the leading edge. If this tab is small enough, the connector will drop in and work fine. With a larger tab, the connect must be fitted to the gun to ensure that while the over-travel is less, there is enough clearance for the trigger to trip the striker.
In pulling the Glock trigger to the rear, there is often a take-up that brings the trigger bar into contact with the connector ramp. After that is what is called the wall,
which is where there is increased effort to continue pulling the trigger to the rear. The steeper the ramp, the more prominent the wall,
while a super-relaxed angle on the connector ramp can virtually eliminate the wall.
Depending on your preference, you might consider a Glock trigger with no wall
to be mushy, or a trigger with a prominent wall
to be difficult to actuate accurately. Typically, for self-defense purposes, you want enough wall
to prevent a negligent discharge when your adrenaline is maxed out. Presumably, this is the reason why the NYPD specifies 8-pound
(using the + connector) or even 12-pound
trigger pulls instead of the standard 5.5-pound
pull in Gen3 Glocks typically sold to civilians. (Gen4 and Gen5 Glocks come with the dot
connector, which is loosely rated at 5 pounds, and the competition models such as the Glock 34 and Glock 35 come with the minus
connector, which is loosely rated at 4.5 pounds.)
Note: Peter Alan Kasler writes in his book GLOCK: The New Wave in Combat Handguns, that the 8-pound New York trigger angle is 105° instead of the stock 90°, which would work out to −15° following the measuring method shown below.
Because of the trade-off of perceived effort versus travel, Glock owners are easily able to fine-tune the trigger action to their taste by swapping connectors, although Glocks carried by concealed-carry permit holders should retain the stock connector for legal reasons … you don’t want an opposing attorney grilling you on the stand about why you made your gun easier
to shoot.
The angle of the Glock connect ramp does not directly equate to the weight
of the trigger pull. However, I measured the angles of the connectors I had on hand and came up with this information, which I was unable to find anywhere else on the Internet.
| Connector | Angle | Designation | Notes |
|---|---|---|---|
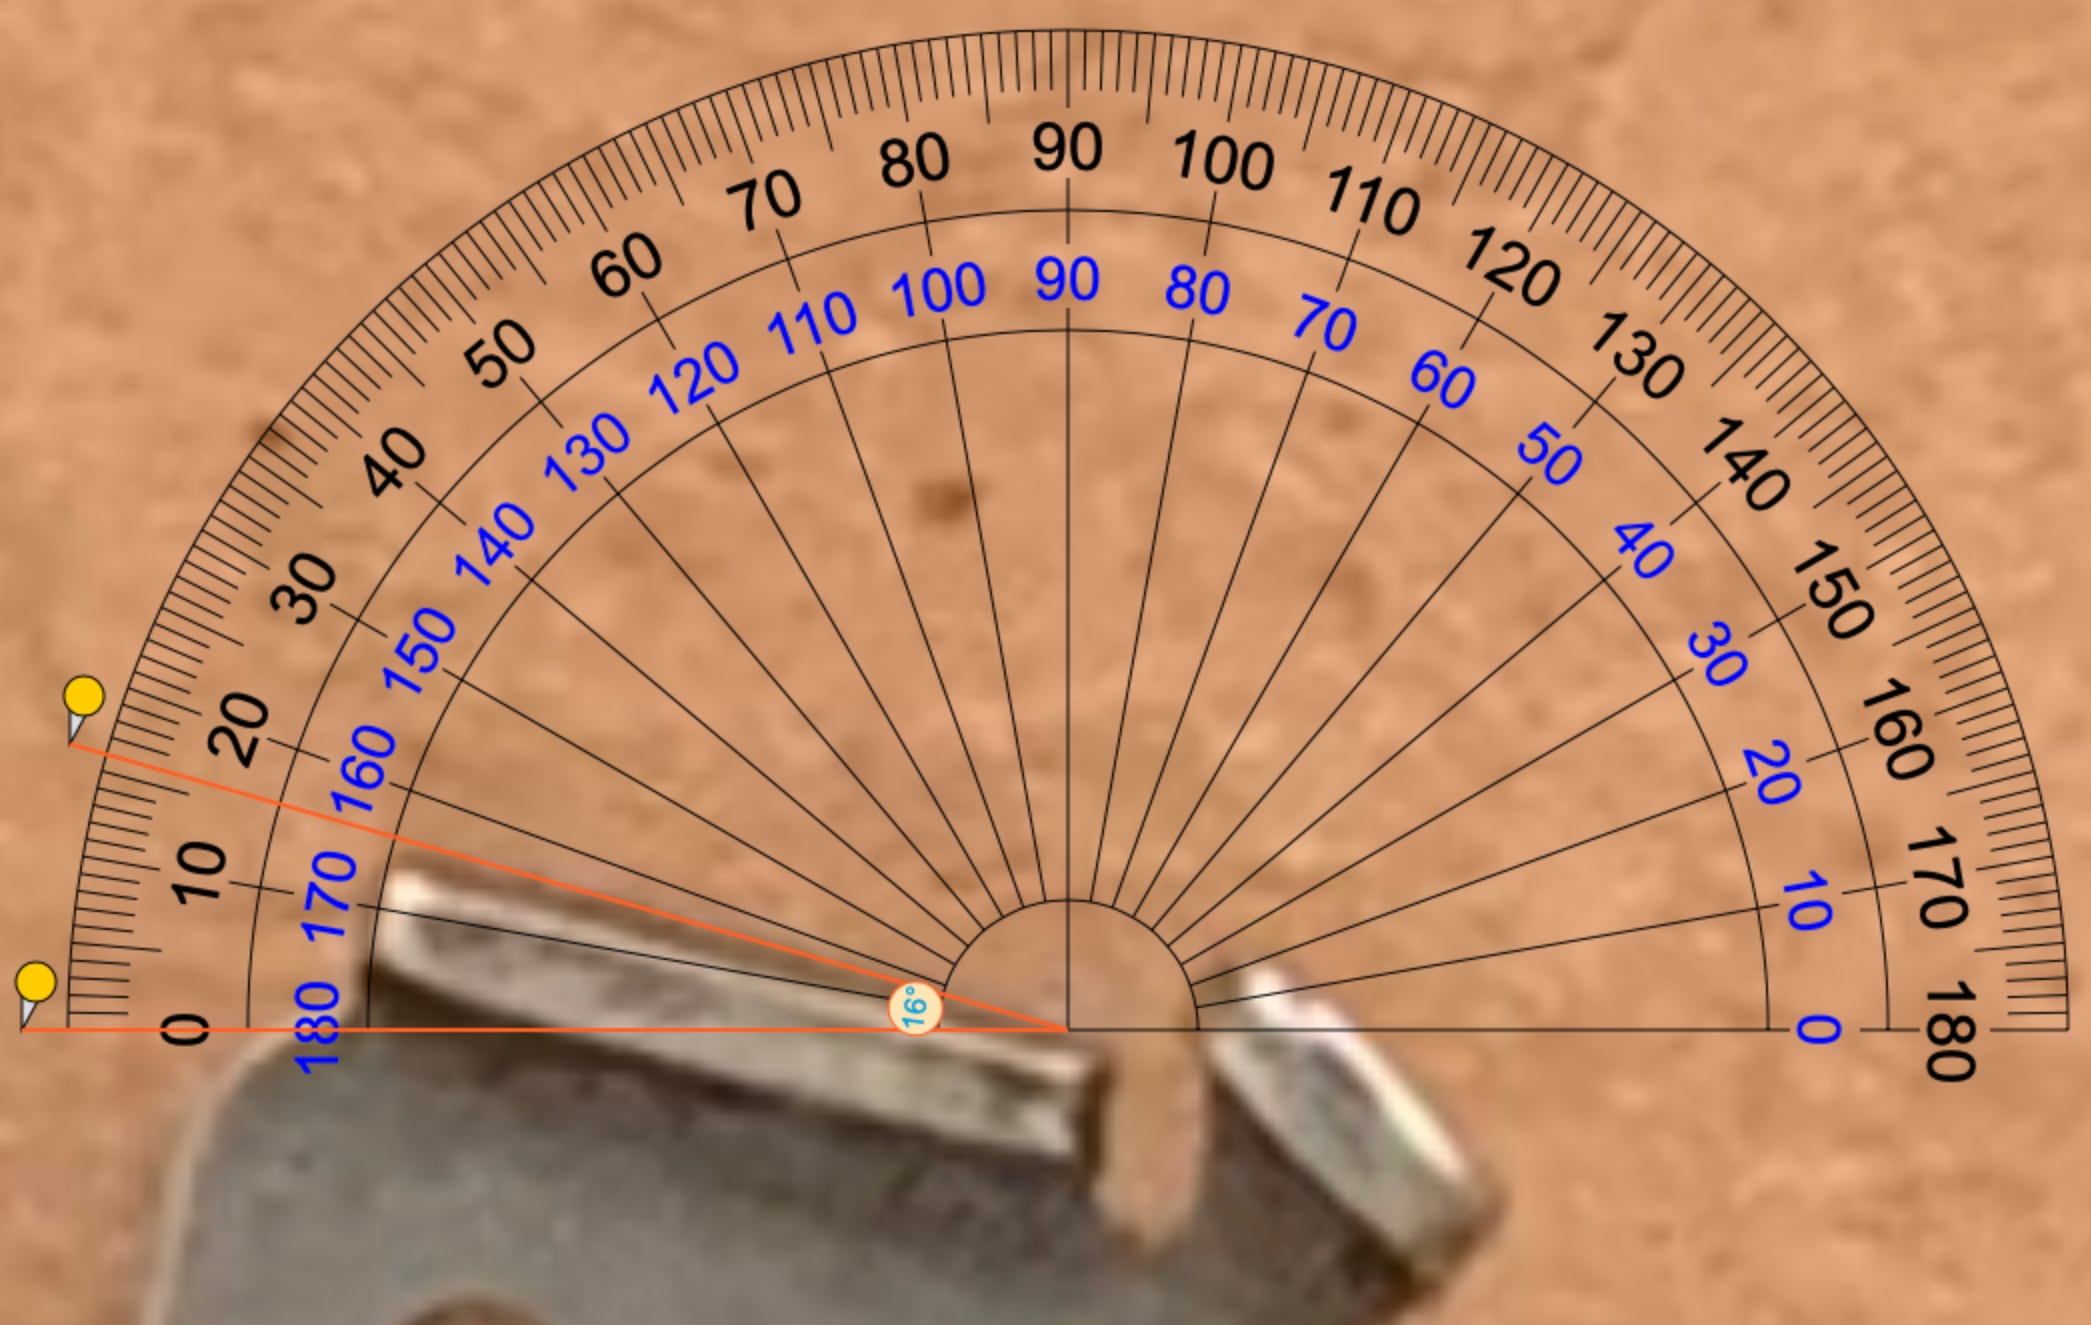
| Ghost Edge 3.5 | 16° | 3.5-pound | Offset ramp to reduce take-up; tab to reduce trigger overtravel |
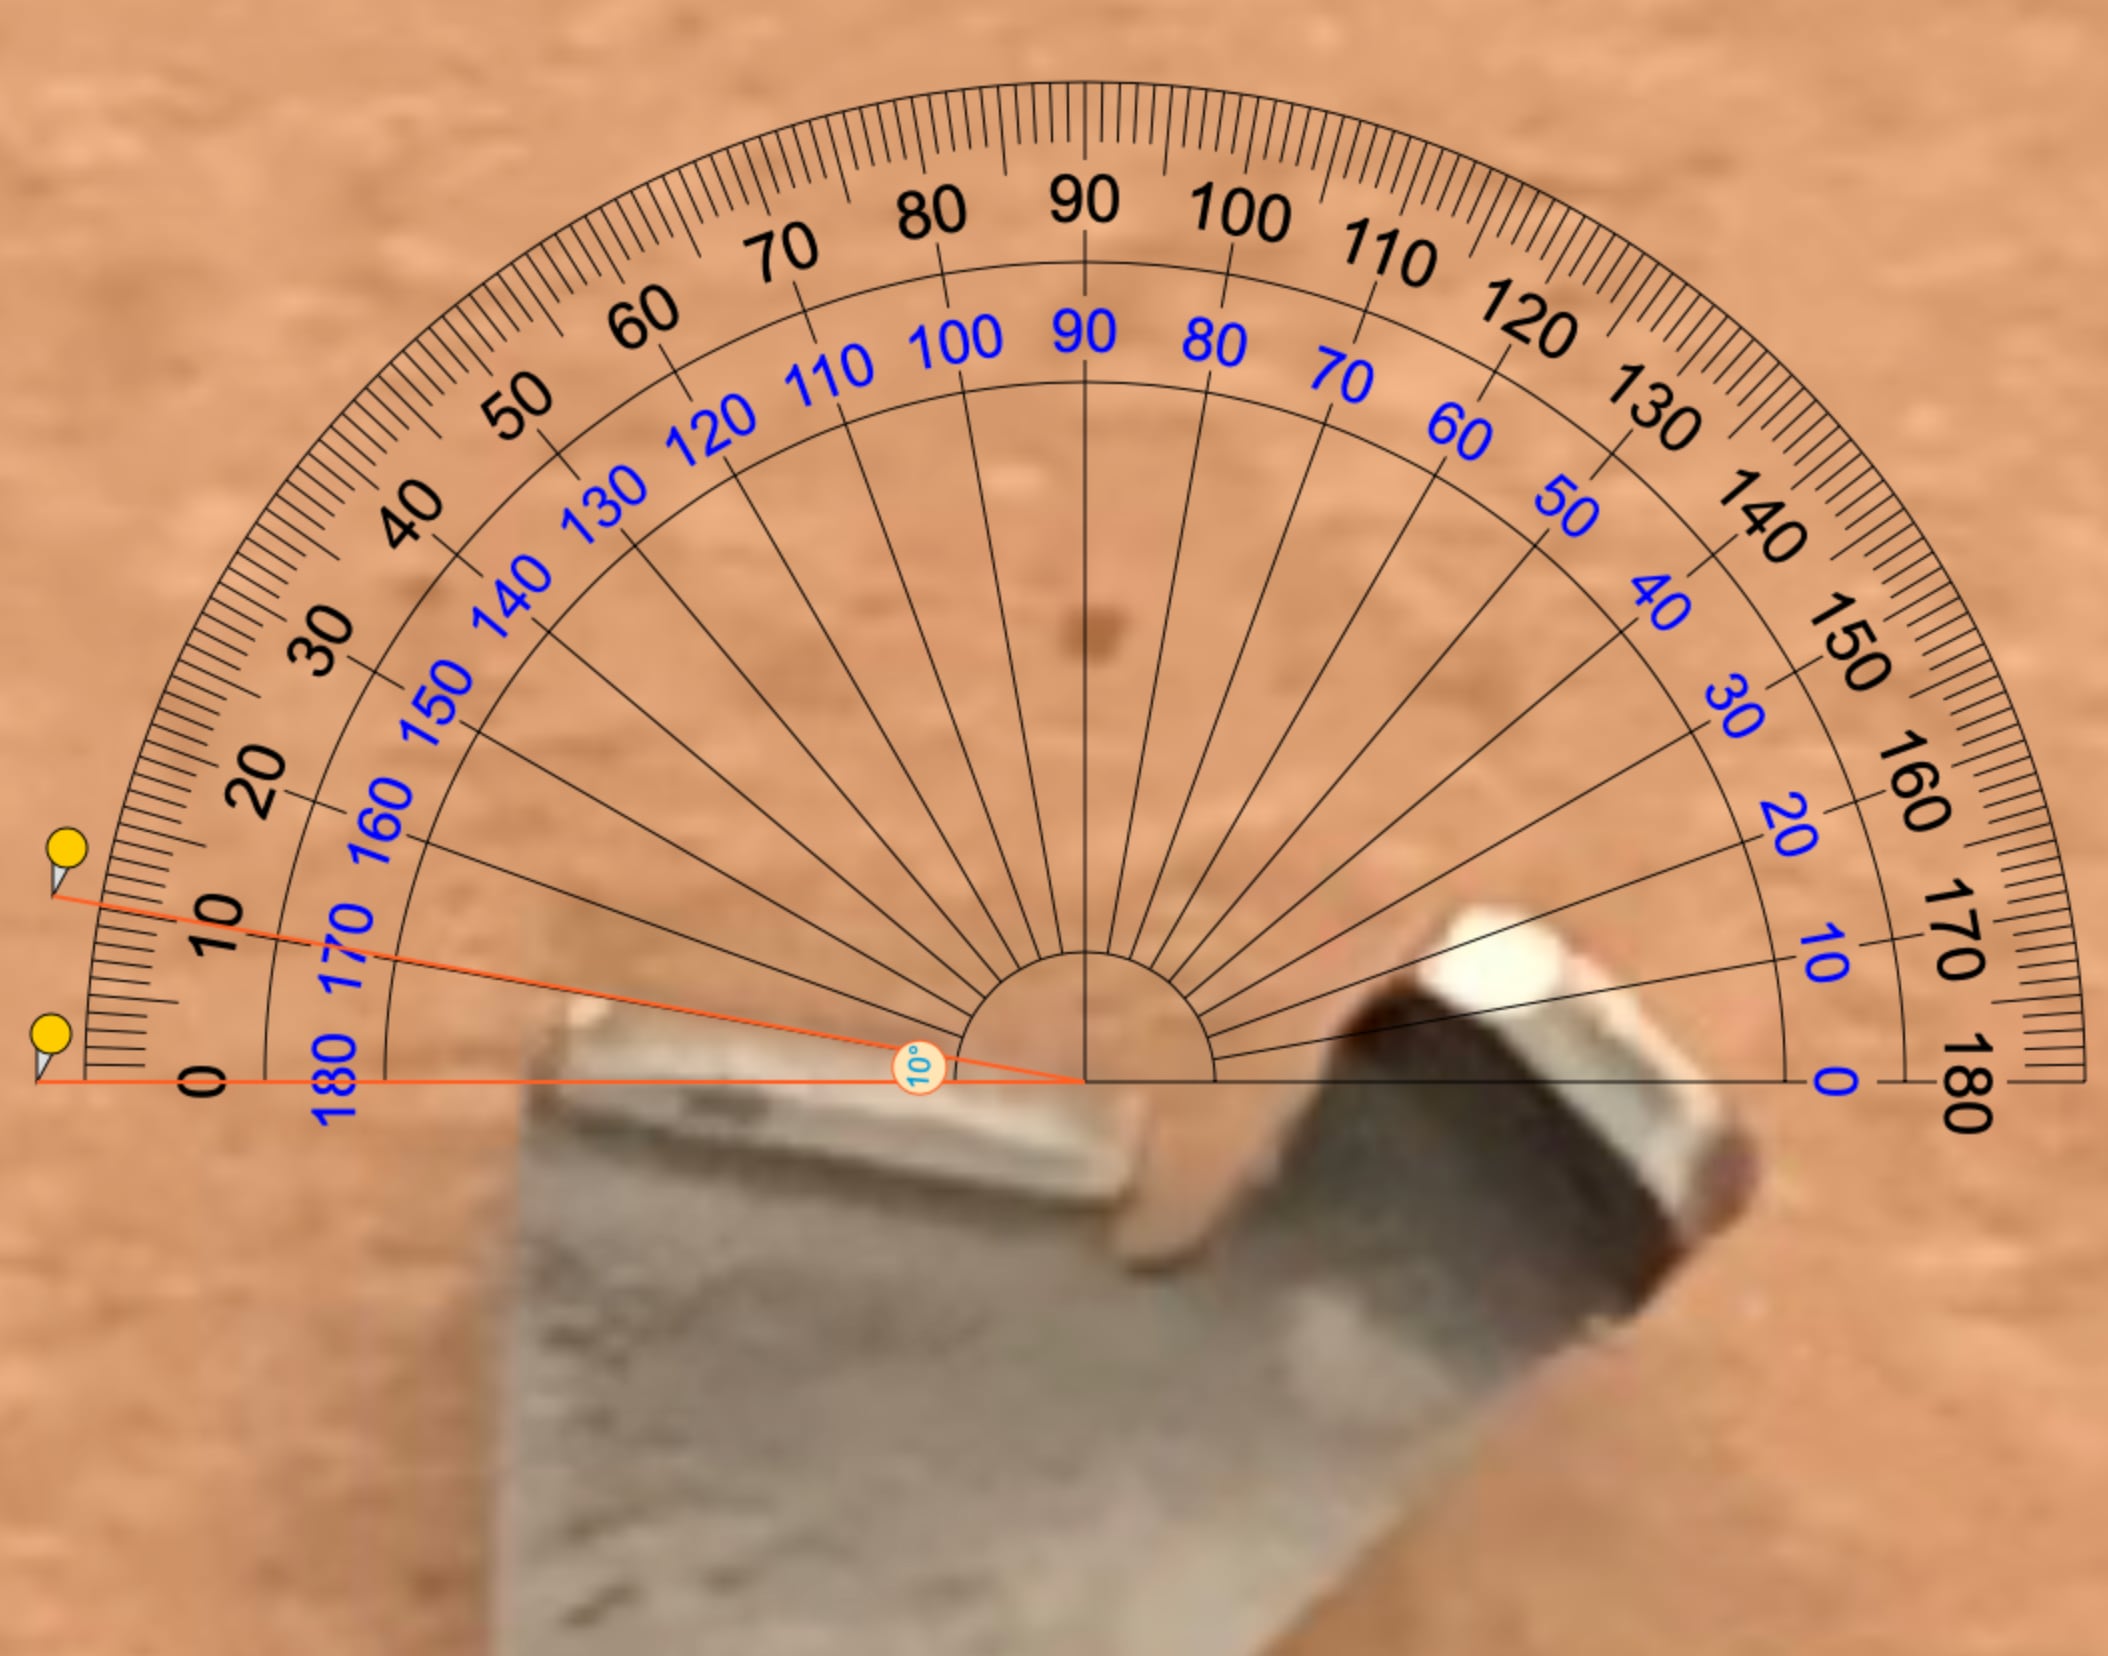
Glock minus |
10° | 4.5-pound | Minus sign stamped on connector |
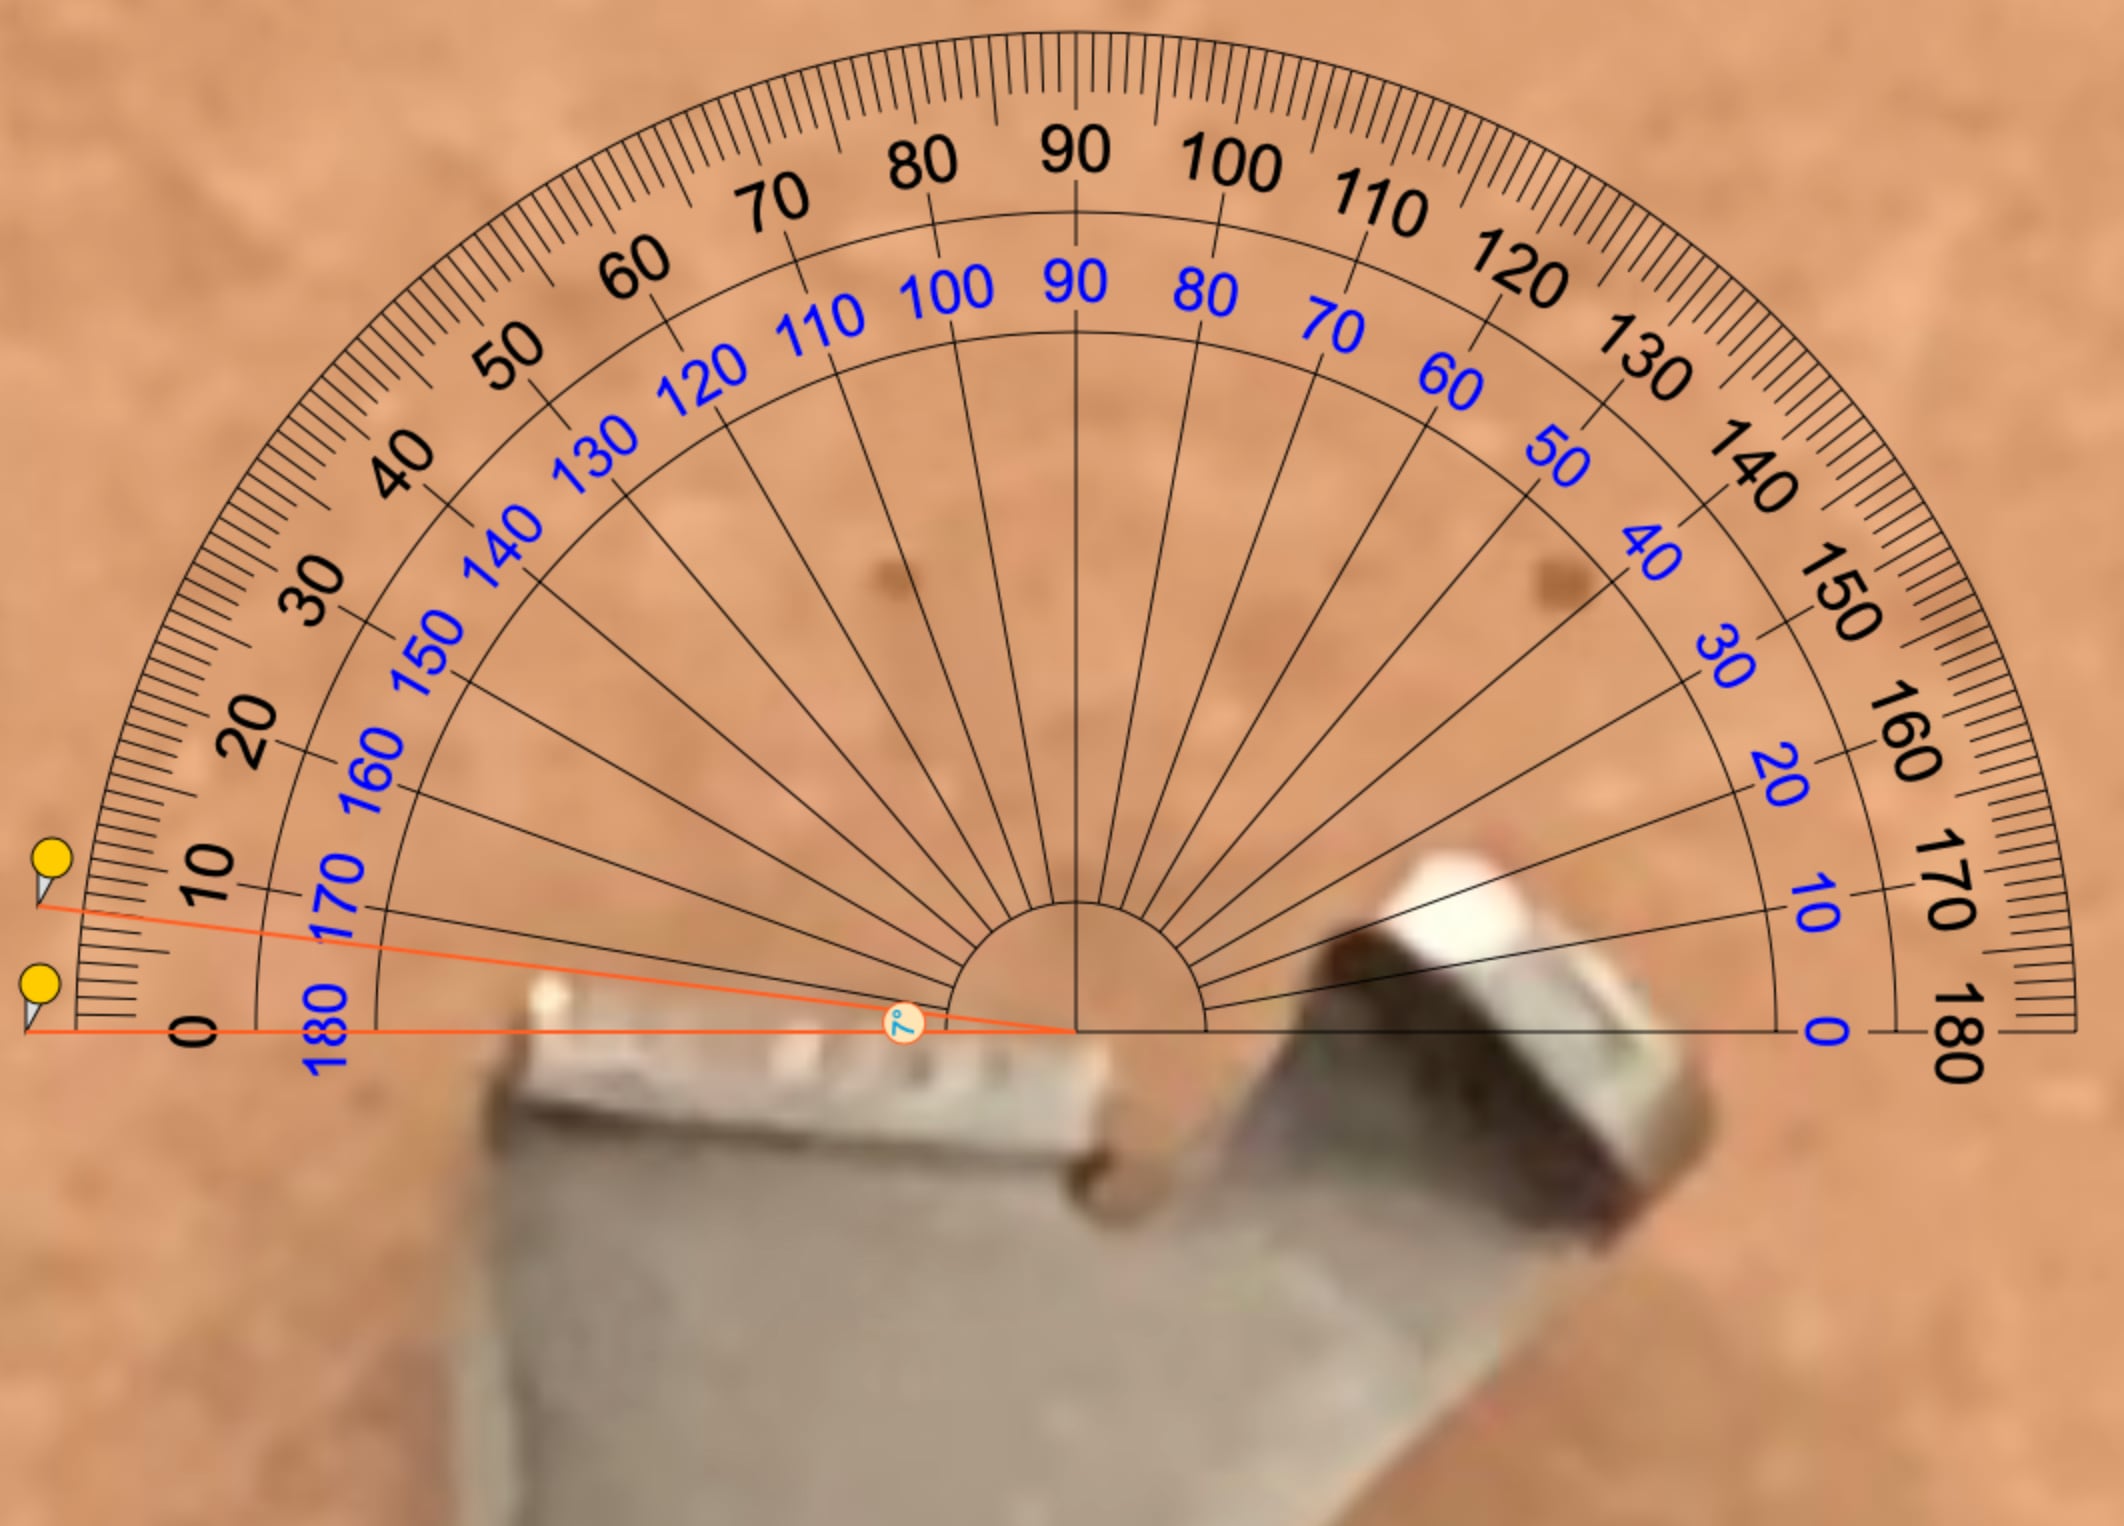
Glock dot |
7° | 5-pound | Dot stamped on connector |
Glock standard |
0° | 5.5-pound | No mark on connector |
To measure these angles, I mounted each connector flat and photographed it as close as I could to the centerline of the lens to mitigate distortion. I then squared up each photo, aligning the stem of the connector vertically. I imported each image into the Online Protractor, which I used to measure the angle of each ramp at 500x magnification. Here are the results:
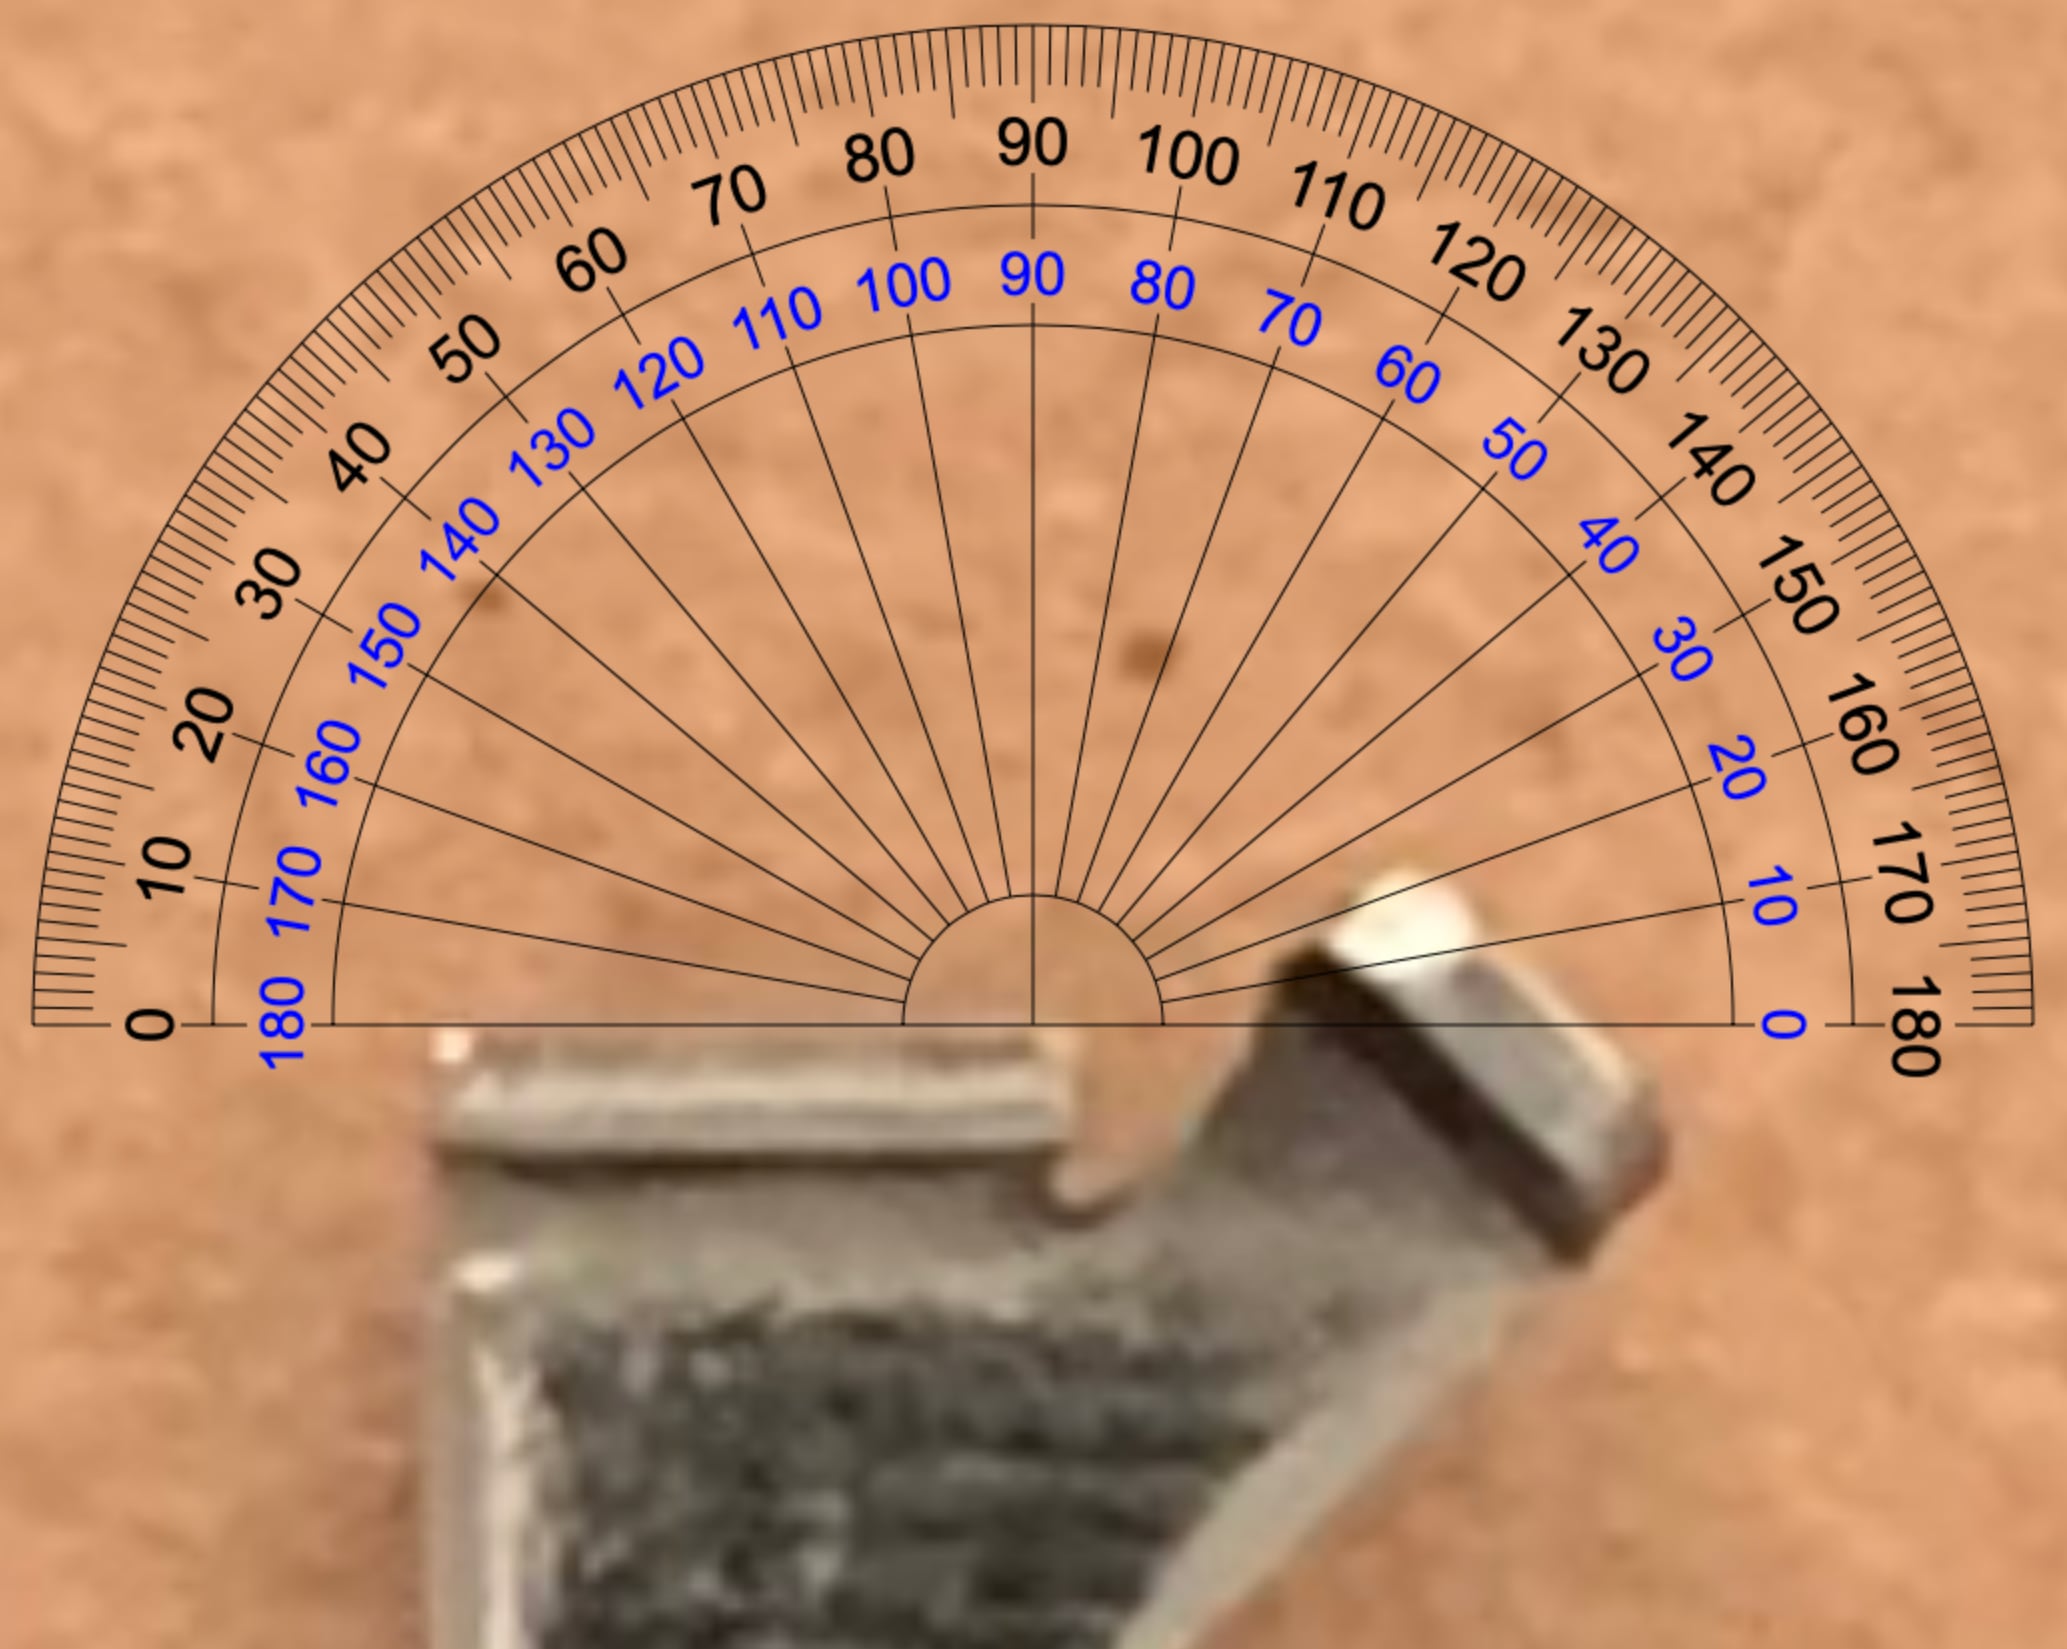
Note that even though I measured off of the top of the connector, the trigger bar contacts the connector ramp on the underside of the lip.